

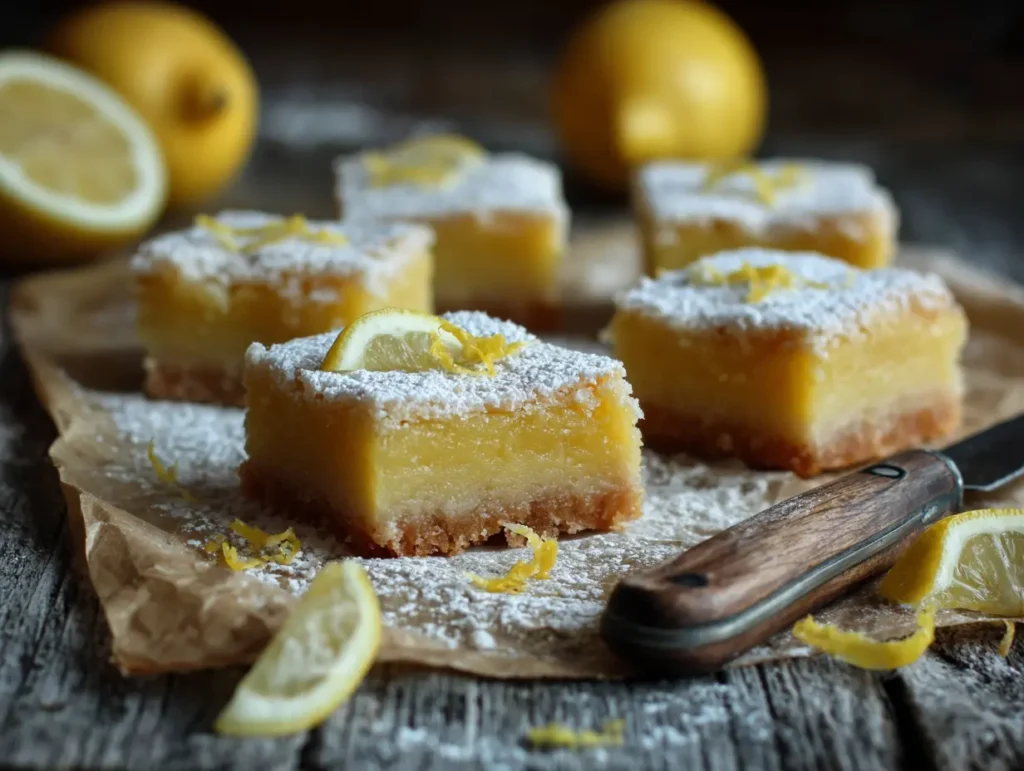
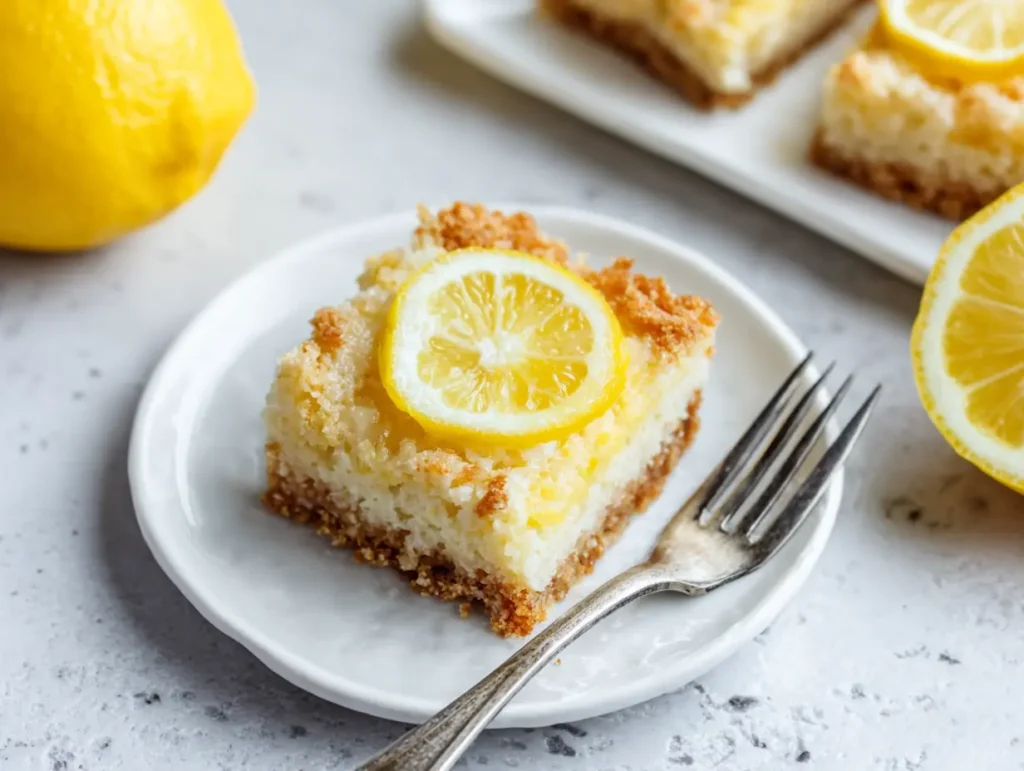
An undeniable ray of sunshine in the world of desserts, lemon bars strike the perfect balance between tangy and sweet, all nestled on a buttery shortbread crust. This classic treat, often referred to as lemon squares, has a vibrant, zesty flavor that can brighten any occasion, from a casual afternoon snack to an elegant party spread. The beauty of this dessert lies in its simplicity; with just a handful of common ingredients, you can create a truly memorable and impressive treat.
The journey to baking the perfect batch of homemade lemon squares is a rewarding one. It starts with creating a crisp, melt-in-your-mouth shortbread base, a sturdy yet tender foundation for the star of the show: the luscious lemon curd filling. This filling is a smooth, rich custard that packs a delightful citrus punch, baked just until it’s set but still incredibly creamy. A final dusting of powdered sugar adds a touch of elegance and an extra layer of sweetness to cut through the tartness. This guide will walk you through every step, ensuring your lemon bars turn out flawlessly every single time. Whether you’re a seasoned baker or new to the kitchen, this lemon bars recipe is designed to be straightforward and utterly delicious.
📖 A Brief History of the Lemon Bar Recipe: From Classic Origins to Modern Delight
The exact origin of the lemon bar is a bit cloudy, as is the case with many beloved recipes passed down through generations. However, food historians generally agree that the recipe as we know it today likely emerged in the mid-20th century in the United States. The first known recipe for a lemon bar was published in the Chicago Daily Tribune on August 27, 1962, submitted by a Mrs. Eleanore Mickelson.
This timing coincides with the rise of modern refrigeration and the wider availability of fresh lemons year-round. It was a time when home bakers were experimenting with new and convenient recipes, and the lemon bar, with its simple ingredient list and straightforward preparation, quickly became a favorite. It gained immense popularity through community cookbooks, potlucks, and bake sales, cementing its place as an iconic American dessert. Its cheerful color and bright flavor made it a symbol of sunny days and happy gatherings.
🍋 Ingredients You Need for a Perfect Lemon Bar Recipe
This classic lemon bar recipe relies on simple, high-quality ingredients to achieve its signature taste and texture. Here’s what you’ll need to create this delightful dessert.
For the Buttery Shortbread Crust:

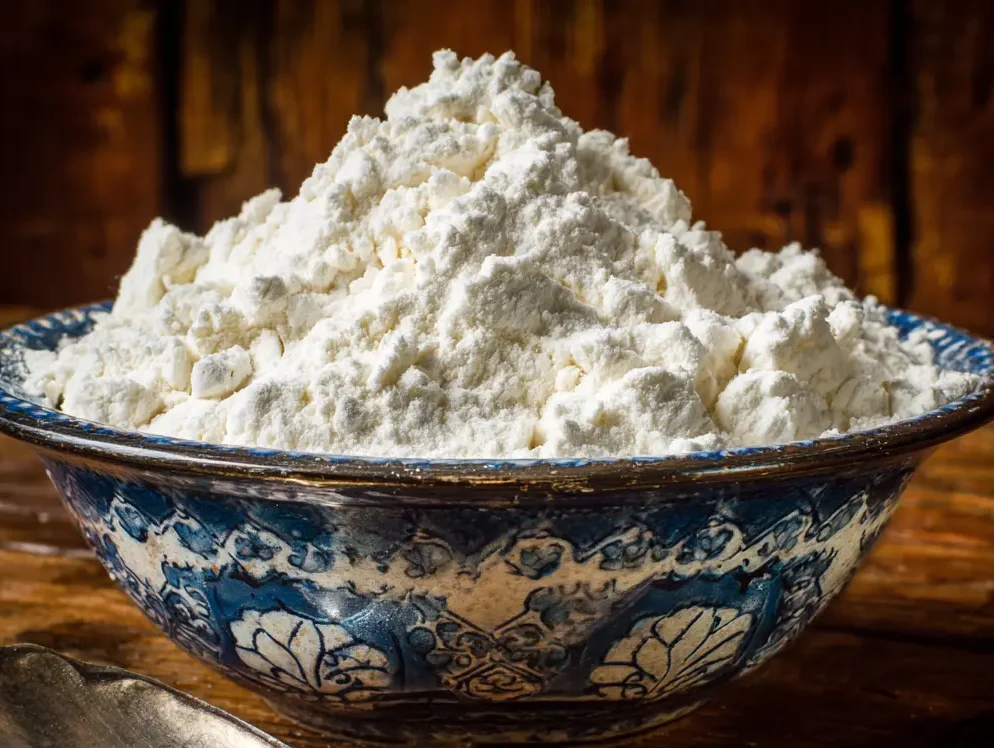
- All-Purpose Flour: Provides the structure for the crust.
- Granulated Sugar: Adds a subtle sweetness that complements the tart filling.
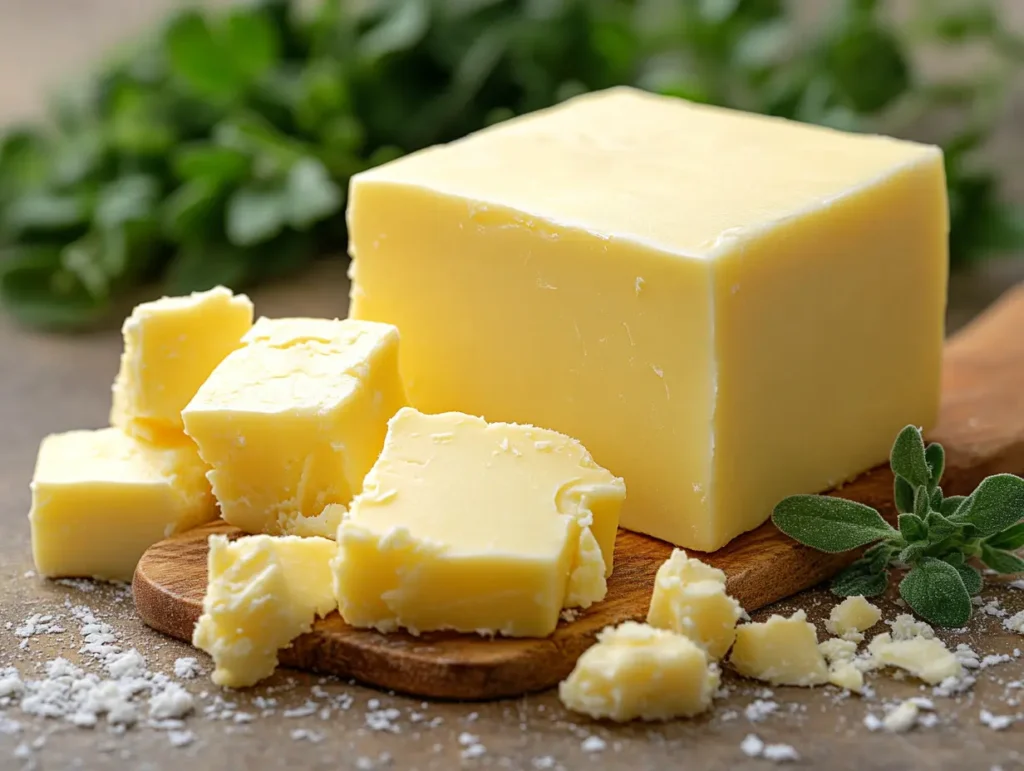
- Unsalted Butter: Cold and cubed, this is the key to a flaky, tender crust.
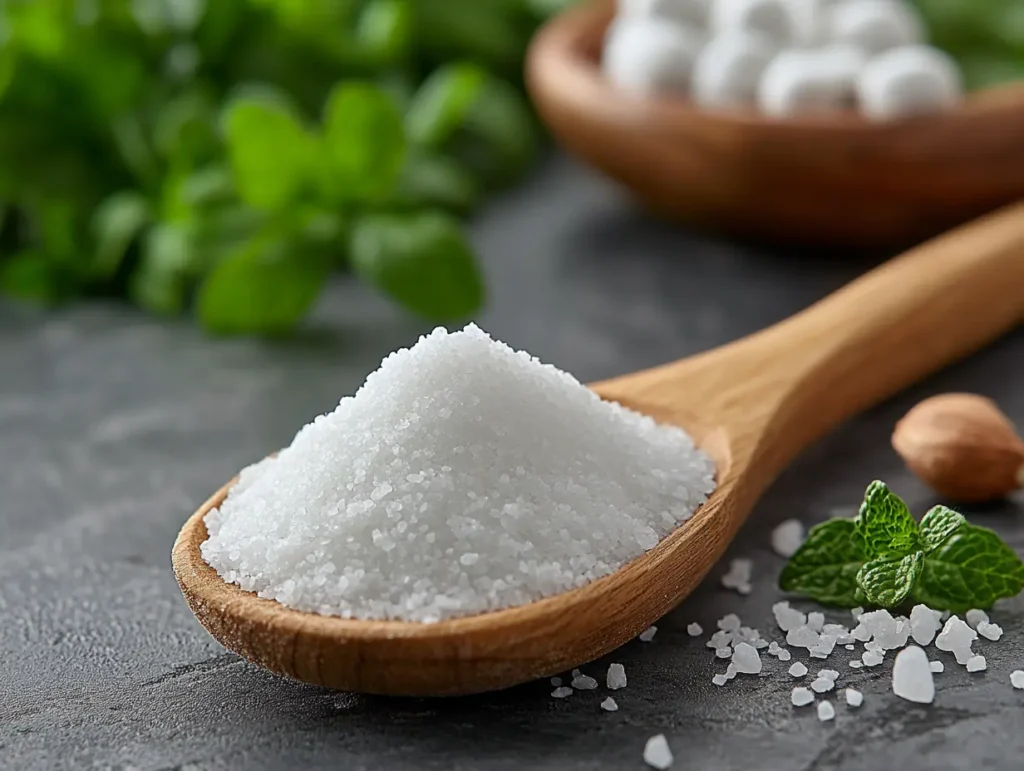
- Salt: A small pinch enhances the flavors and balances the sweetness.
For the Luscious Lemon Filling:


- Granulated Sugar: The primary sweetener that balances the intense tartness of the lemons.
- All-Purpose Flour: A small amount acts as a thickener, helping the filling to set properly.
- Large Eggs: These provide the rich, custardy texture of the filling.
- Fresh Lemon Juice: The star ingredient! Freshly squeezed juice offers the brightest, most authentic flavor.
- Lemon Zest: Tiny flecks of zest infuse the filling with aromatic lemon oils, intensifying the citrus taste.
- Powdered Sugar: For dusting over the finished bars, adding a touch of sweetness and a beautiful final look.
🥣 How to Make the Best Lemon Bar Recipe: Step-by-Step Instructions
Follow these detailed instructions to bake flawless, bakery-quality lemon bars right in your own kitchen. This recipe breaks down the process into two main parts: creating the perfect shortbread crust and then whipping up the zesty lemon filling.
Part 1: Crafting the Shortbread Crust
- Preheat and Prepare: Begin by preheating your oven to 350°F (175°C). Take an 8×8 inch baking pan and line it with parchment paper, leaving some overhang on the sides. This overhang will act as handles, making it much easier to lift the bars out of the pan later.
- Combine Dry Ingredients: In a medium-sized bowl, whisk together the all-purpose flour, granulated sugar, and a pinch of salt. This ensures all the dry components are evenly distributed before adding the butter.
- Cut in the Butter: Add the cold, cubed unsalted butter to the flour mixture. Using a pastry blender, your fingertips, or a food processor, cut the butter into the flour until the mixture resembles coarse crumbs with some pea-sized butter pieces remaining. Working with cold butter is crucial for a tender, flaky crust.
- Press and Bake: Transfer the crumbly mixture to your prepared baking pan. Press it down firmly and evenly across the bottom to form a solid layer. Bake for 18-20 minutes, or until the edges are lightly golden brown.
Part 2: Mixing the Lemon Filling and Final Bake
- Prepare the Filling: While the crust is baking, you can prepare the lemon filling. In a separate large bowl, whisk together the granulated sugar and the small amount of all-purpose flour. This prevents the flour from clumping when the wet ingredients are added.
- Add Wet Ingredients: Whisk in the large eggs one at a time until they are fully incorporated. Next, add the freshly squeezed lemon juice and lemon zest. Continue to whisk until the mixture is smooth and well-combined. The vibrant yellow color and fresh citrus aroma will let you know you’re on the right track.
- Pour and Bake Again: Once the shortbread crust is lightly golden, carefully remove it from the oven. Immediately pour the prepared lemon filling evenly over the hot crust.
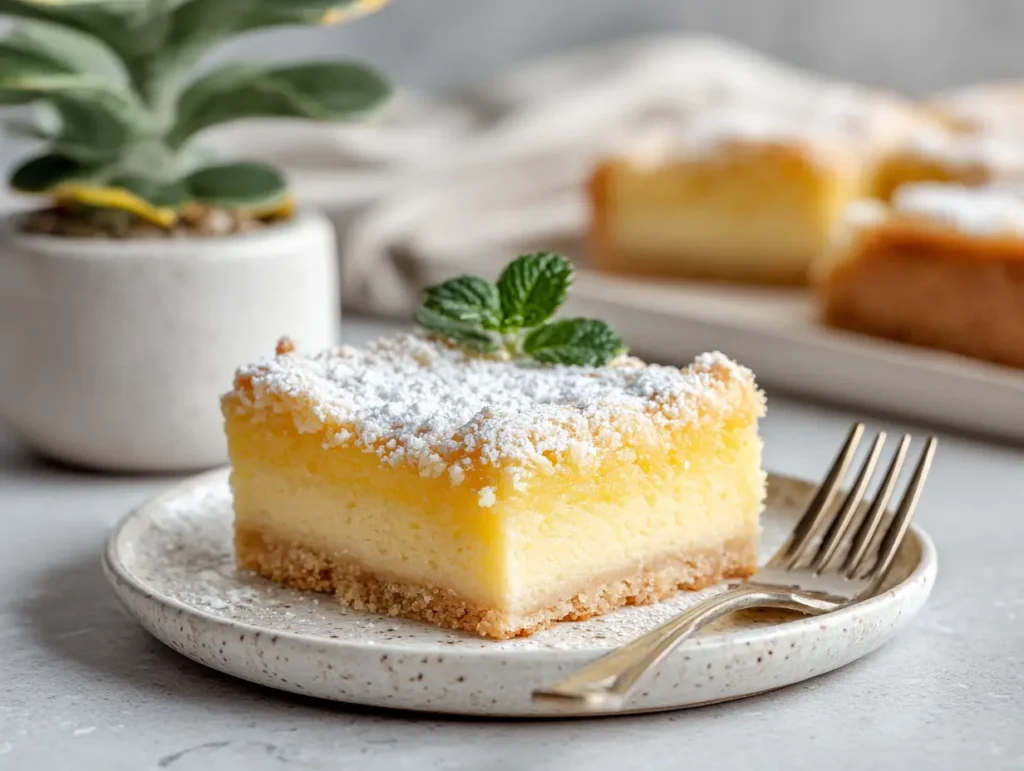
- Final Bake: Return the pan to the oven and bake for another 20-25 minutes. The filling is done when it is just set; it should have a slight jiggle in the center. Over-baking can lead to a rubbery texture, so keep a close eye on it.
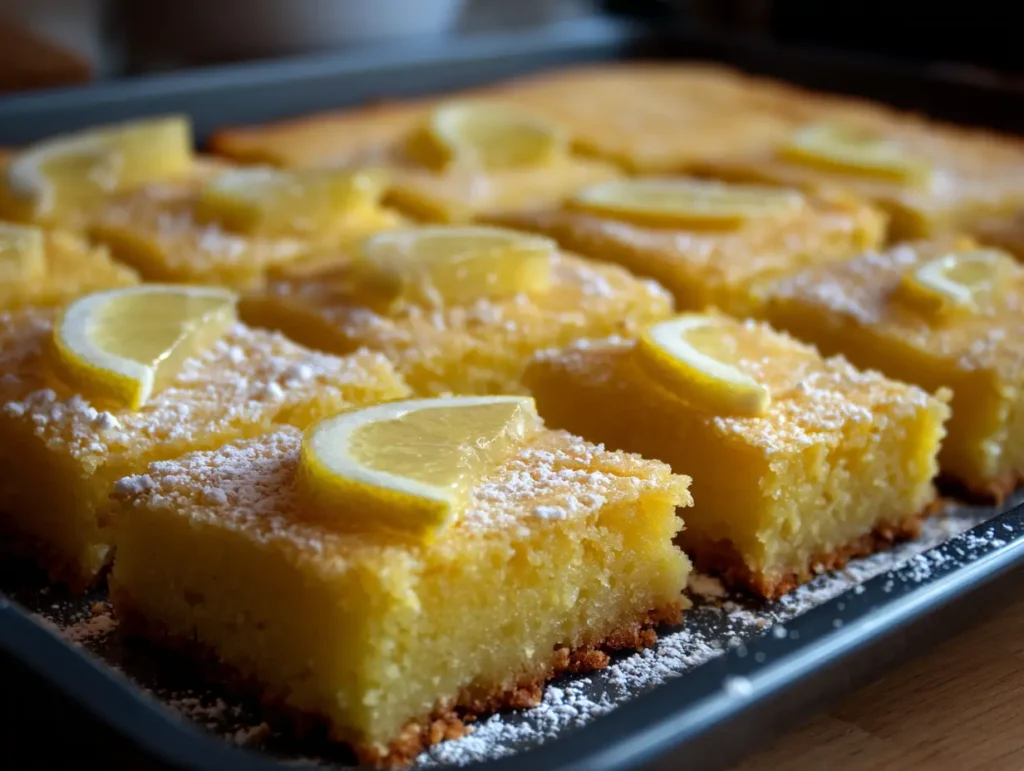
- Cool and Chill: Let the pan cool completely on a wire rack at room temperature. Once cooled, transfer the pan to the refrigerator and chill for at least 2 hours. This chilling step is essential for the filling to set firmly, which ensures clean, perfect squares when you cut them.
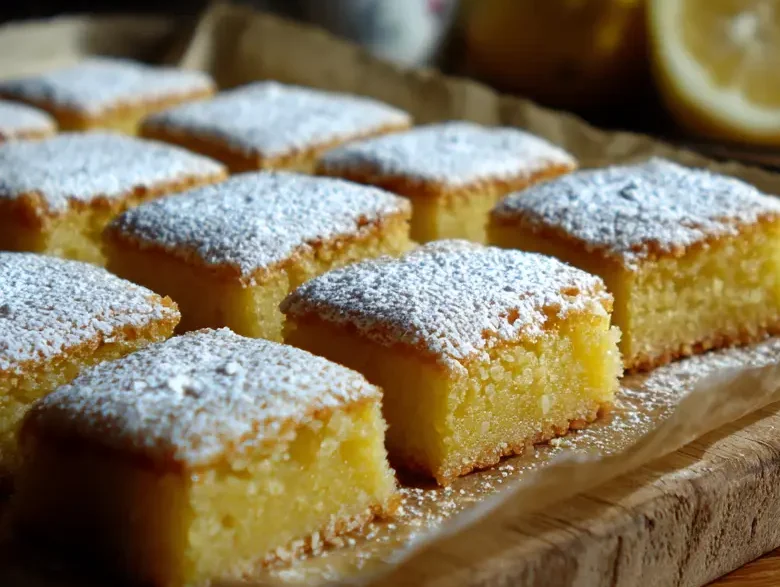
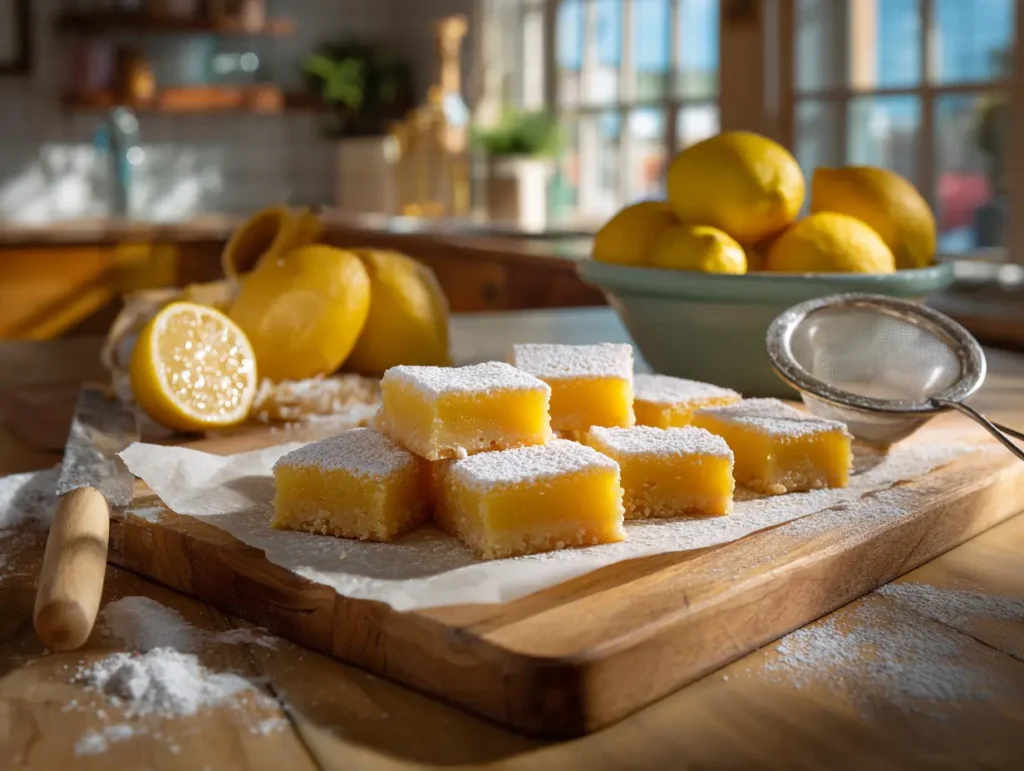
- Serve and Enjoy: Once chilled, use the parchment paper handles to lift the entire block of lemon bars out of the pan. Dust generously with powdered sugar just before serving. Cut into squares and enjoy this best lemon dessert! For those who enjoy baking, exploring other healthy baked recipes can be a fun next step.
💡Expert Tips for a Perfect Lemon Bar Recipe Every Time
Achieving the perfect balance of a sturdy crust and a silky, tangy filling is the hallmark of a great lemon bar . Here are some expert tips and common mistakes to avoid.
- Use Fresh Lemon Juice: This is non-negotiable for the best flavor. Bottled lemon juice often has a dull, slightly bitter taste that simply can’t compare to the bright, zesty kick of freshly squeezed lemons.
- Don’t Over-Bake the Filling: The key to a creamy lemon filling is to bake it just until the center is set. It should still have a slight wobble. The filling will continue to firm up as it cools and chills.
- Line Your Pan with Parchment Paper: Leaving an overhang of parchment paper on two sides creates “slings” that make it incredibly easy to lift the entire slab of bars out of the pan for clean cutting.
- Let Them Cool Completely: Be patient! The bars need to cool at room temperature and then chill in the refrigerator for at least two hours. This step is crucial for the filling to set properly, allowing for neat slices.
- Sift the Powdered Sugar: For a beautiful, even dusting on top, use a fine-mesh sieve to sift the powdered sugar. This prevents clumps and creates a professional-looking finish.
- Zest Before You Juice: It’s much easier to zest a whole lemon than a squeezed one. Remember to only zest the yellow part of the peel, as the white pith underneath can be bitter.
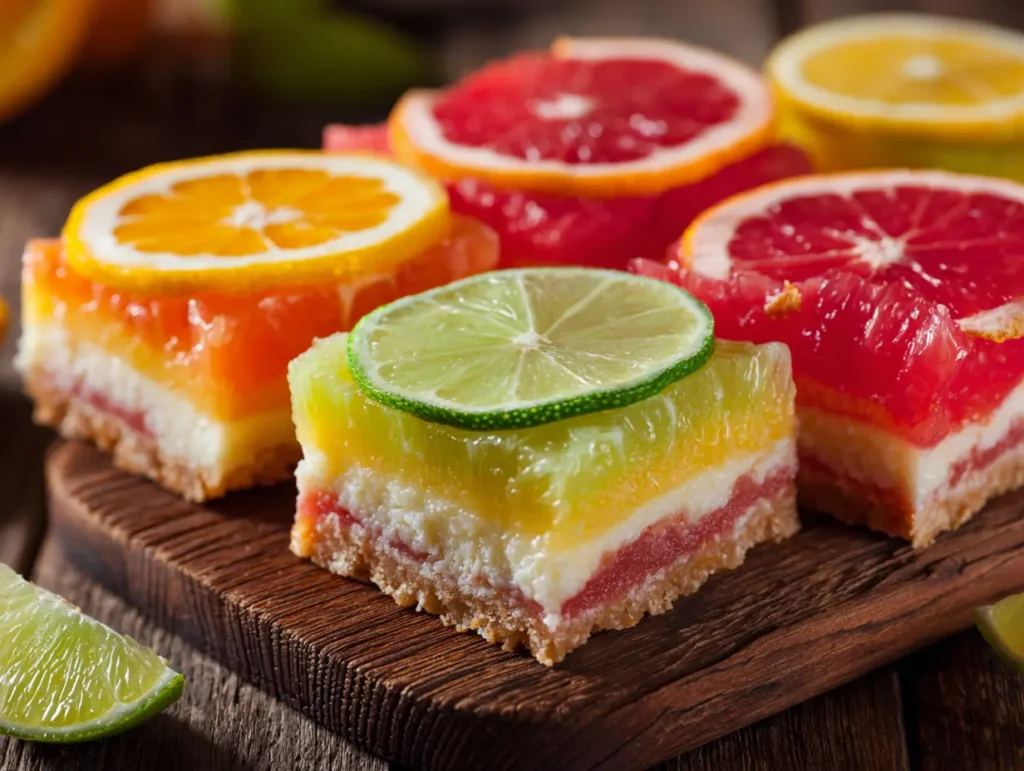
🌍 Creative Twists and Global Variations of the Classic Lemon Bar Recipe
While the classic lemon bar is a treasure, many cultures have their own citrus-based desserts that share a similar spirit. Exploring these variations can be a delightful culinary adventure. For those interested in expanding their international cooking skills, trying some easy Japanese recipes can be a great starting point.
- Meyer Lemon Bars: For a slightly sweeter and more floral note, substitute regular lemons with Meyer lemons. Their unique flavor provides a subtle twist on the classic.
- Lime or Grapefruit Bars: Swap out the lemon juice and zest for fresh lime or grapefruit juice and zest for an entirely new flavor profile. Lime bars are particularly popular in tropical regions.
- Coconut Crust Lemon Bars: Add shredded coconut to the shortbread crust for a chewy texture and a tropical flavor that pairs wonderfully with the tangy lemon filling.
- Gluten-Free Lemon Bars: This recipe can be easily adapted for a gluten-free diet. Simply substitute the all-purpose flour in both the crust and the filling with a high-quality gluten-free all-purpose flour blend. This is just one of many gluten and dairy-free recipes that can be adapted for dietary needs.
- Lemon Herb Bars: For a sophisticated, savory-sweet twist, infuse the filling with finely chopped herbs like thyme, rosemary, or lavender. This variation is perfect for a more grown-up palate.
🍎 Lemon Bar Recipe: Nutrition Facts and Healthier Optionsformation
While undeniably a dessert, these homemade lemon squares offer some benefits, especially when made with fresh, whole ingredients. Below is an approximate nutritional breakdown per serving, based on this recipe yielding 16 bars.
| Nutrient | Amount per Serving (Approx.) |
| Calories | 150-180 kcal |
| Total Fat | 8g |
| Saturated Fat | 5g |
| Cholesterol | 45mg |
| Sodium | 70mg |
| Total Carbohydrates | 18g |
| Dietary Fiber | <1g |
| Sugars | 12g |
| Protein | 2g |
| Vitamin C | 10% of DV |
Please note that these values are estimates and can vary based on the specific ingredients and brands used. The vitamin C content is a direct benefit from using fresh lemon juice, which is known for its immune-boosting properties.
For those looking for other satisfying and nutritious meals, exploring high protein soup recipes can provide some excellent options for healthy meal prep.
📦 How to Store and Freeze Your Lemon Bar Recipe for Maximum Freshnessing Tips
Proper storage is key to keeping your lemon bars fresh and delicious for as long as possible.
- Refrigeration: Lemon bars should always be stored in the refrigerator due to their egg-based custard filling. Place them in an airtight container, or on a plate tightly covered with plastic wrap. They will stay fresh for up to one week. You can separate layers with parchment paper to prevent sticking.
- Freezing: These bars freeze exceptionally well! To freeze, first place the cut bars on a baking sheet in a single layer and freeze until firm (about 1-2 hours). This prevents them from sticking together. Then, wrap each bar individually in plastic wrap and place them in a freezer-safe bag or airtight container. They can be frozen for up to 3 months.
- Thawing: To thaw, simply transfer the frozen bars to the refrigerator and let them thaw for several hours or overnight. Avoid thawing them at room temperature to maintain the best texture. It’s best to dust with powdered sugar after they have thawed, just before serving.
🤔 Lemon Bar Recipe FAQ: Your Top Questions Answered
Here are answers to some of the most common questions about making homemade lemon bars.
1. Why is my lemon filling runny?
A runny filling is usually due to under-baking. The filling should be just set in the center with a slight jiggle when you take it out of the oven. It will firm up significantly as it cools and chills. Make sure you are also using the correct amount of flour in the filling, as it acts as a thickener.
2. Can I use bottled lemon juice instead of fresh?
While you can, it’s highly discouraged. The flavor of fresh lemon juice is significantly brighter and more vibrant. Bottled juice can impart a dull or sometimes metallic taste to your final product.
3. Why did my crust get soggy?
A soggy crust can happen if the filling is poured onto a cold crust or if the bars are not baked long enough for the filling to set. Pouring the filling over the crust while it’s still hot from its initial bake helps create a seal that prevents sogginess.
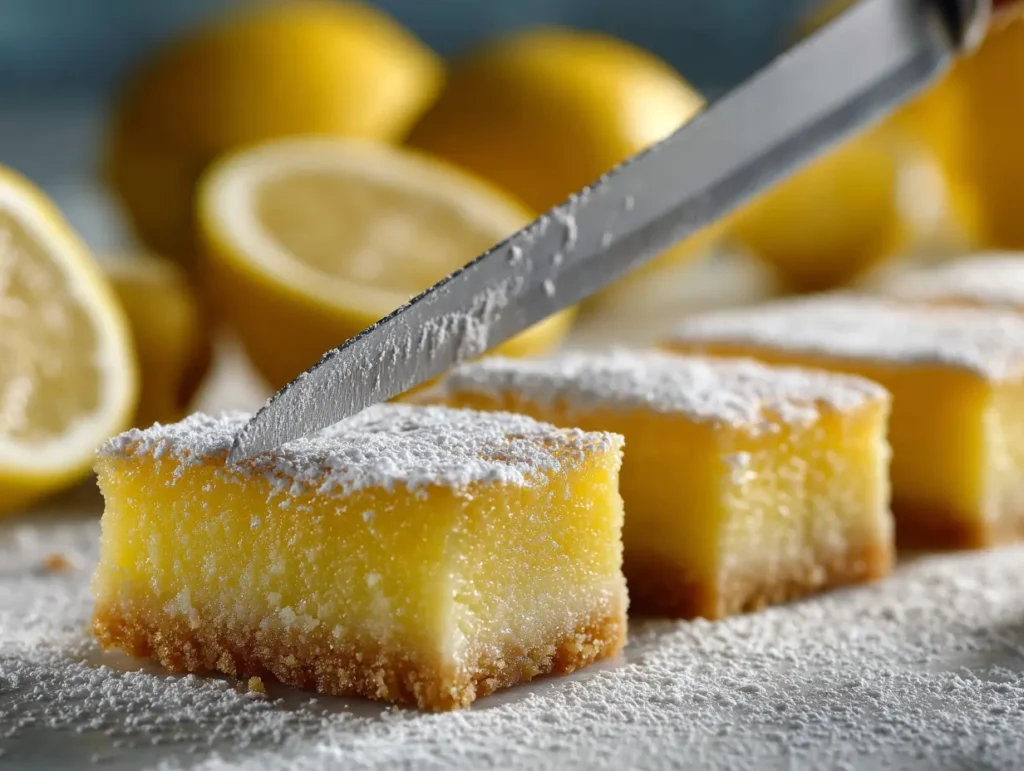
4. How do I get clean, neat cuts?
The secret to clean cuts is threefold: use a parchment paper sling to lift the bars out, make sure the bars are thoroughly chilled, and use a large, sharp knife. Wiping the knife clean with a damp paper towel between each cut will also prevent crumbs from dragging.
5. Can I make this recipe gluten-free?
Absolutely. You can easily adapt this into a gluten-free recipe by swapping the all-purpose flour with a good quality 1-to-1 gluten-free baking flour blend for both the crust and the filling. For more ideas on gluten-free cooking, you might enjoy these gluten-free dinner recipes.
🎉 Ready to Get Baking?
There’s a special kind of satisfaction that comes from baking a dessert from scratch, and this lemon bars recipe is the perfect place to start or to perfect your skills. The contrast of the buttery, crumbly shortbread with the smooth, zesty lemon filling is a timeless combination that delights nearly everyone. It’s a versatile dessert, equally at home at a summer picnic as it is on a holiday dessert table.
Now that you’re armed with detailed instructions, expert tips, and creative variations, you are fully equipped to create the best lemon dessert you’ve ever tasted. Don’t be afraid to experiment with different citrus fruits or add your own unique twist. After you’ve mastered this, you might want to try another sweet treat like some easy healthy desserts to continue your baking journey. Happy baking!
🍋 Must-Try Lemon Bars Recipe
Print
Classic Lemon Bars with Buttery Shortbread Crust
- Total Time: 3 hours (including cooling/chilling)
- Yield: 16 bars 1x
- Diet: Vegetarian
Description
These classic lemon bars feature a crisp, buttery shortbread base topped with a rich, zesty lemon custard. Simple to make and bursting with fresh citrus flavor, they’re the perfect balance of sweet and tart for any occasion.
Ingredients
- 1 cup (125g) all-purpose flour
- 1/4 cup (50g) granulated sugar
- 1/2 cup (113g) unsalted butter, cold and cubed
- Pinch of salt
- 1 cup (200g) granulated sugar
- 2 tablespoons (15g) all-purpose flour
- 3 large eggs
- 1/2 cup (120ml) fresh lemon juice
- 1 tablespoon lemon zest
- Powdered sugar, for dusting
Instructions
- Preheat oven to 350°F (175°C). Line an 8×8 inch pan with parchment paper, leaving an overhang.
- In a bowl, mix 1 cup flour, 1/4 cup sugar, and salt. Cut in butter until the mixture resembles coarse crumbs. Press into pan and bake 18–20 minutes until edges are golden.
- While crust bakes, whisk 1 cup sugar and 2 tbsp flour. Add eggs, then lemon juice and zest; mix until smooth.
- Pour filling over hot crust and bake 20–25 minutes until just set with a slight jiggle. Cool completely, then chill for 2 hours.
- Lift from pan, dust with powdered sugar, and cut into squares to serve.
Notes
Use fresh lemon juice for best flavor, and chill thoroughly before slicing for clean cuts.
- Prep Time: 15 minutes
- Cook Time: 45 minutes (including both bakes)
- Category: Dessert
- Method: Baking
- Cuisine: American
Nutrition
- Serving Size: 1 bar
- Calories: 170
- Sugar: 12 g
- Sodium: 70 mg
- Fat: 8 g
- Saturated Fat: 5 g
- Unsaturated Fat: 2.5 g
- Trans Fat: 0 g
- Carbohydrates: 18 g
- Fiber: 1 g
- Protein: 2 g
- Cholesterol: 45 mg
Keywords: lemon bars, lemon squares, citrus dessert, shortbread crust, easy baking recipe